Switching to Quantum Fiber
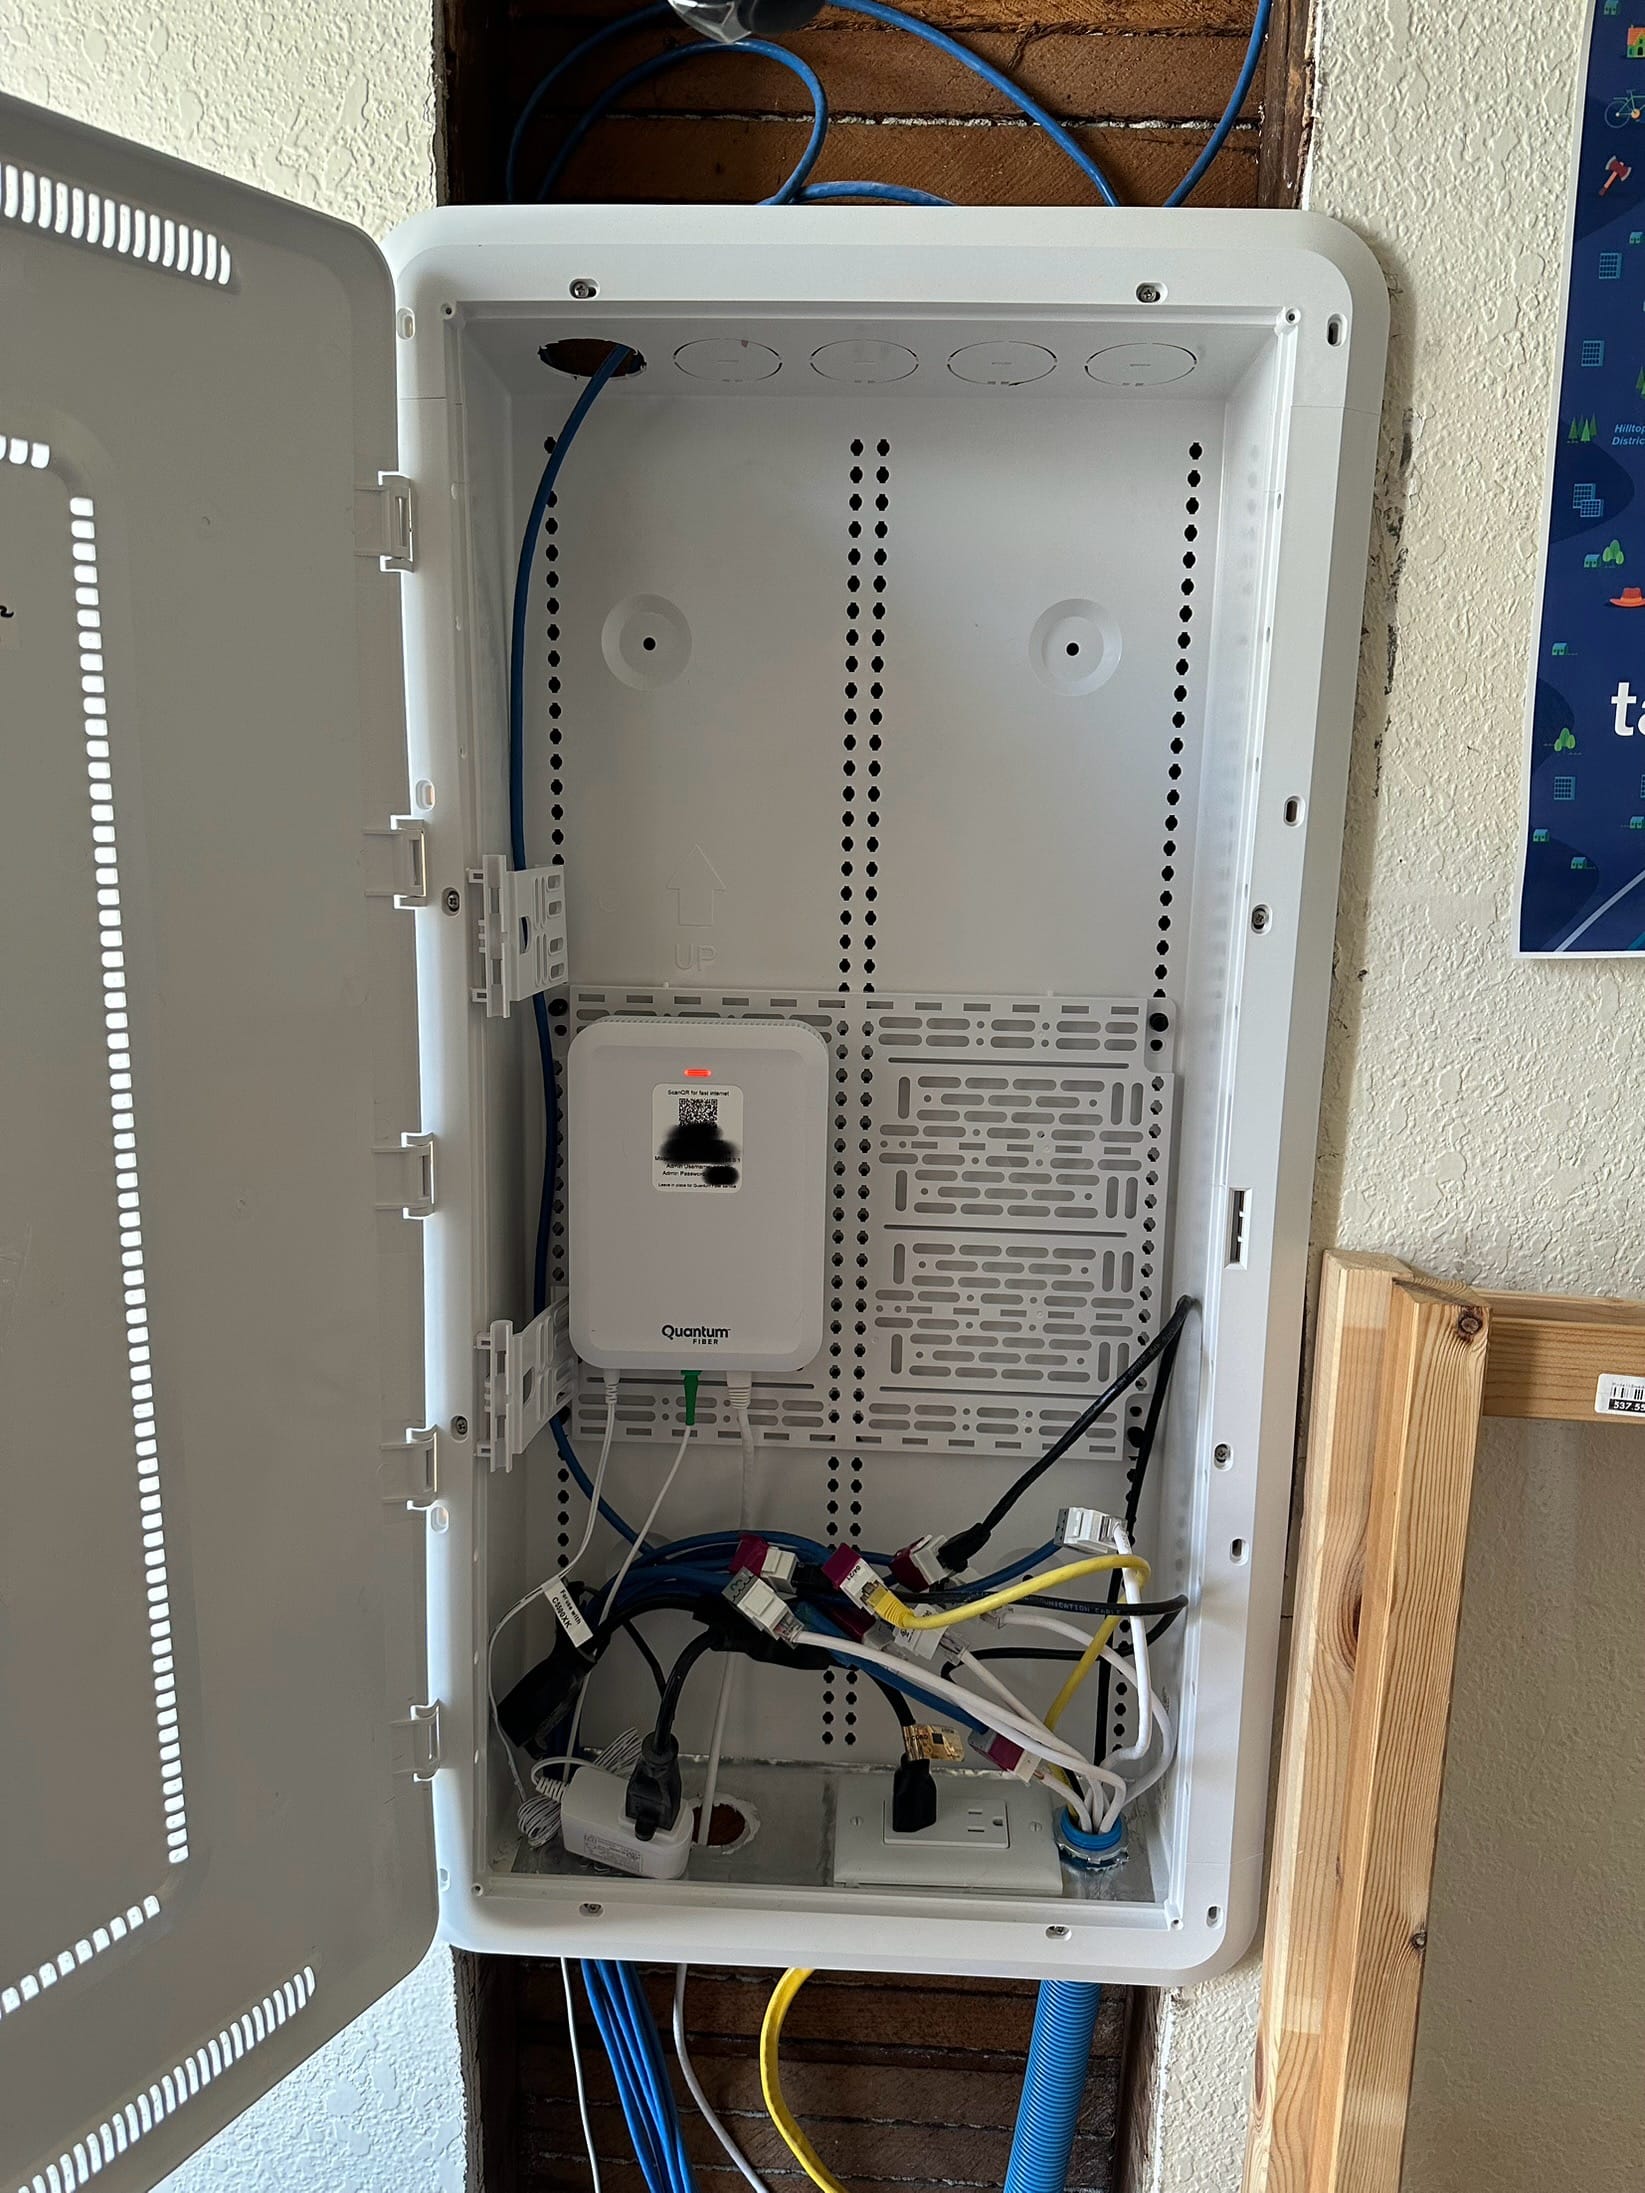
I mentioned in my previous post that I recently switched my internet plan from CenturyLink to Quantum Fiber. I did this for two reasons—first, the optical network terminal (ONT) installed by Quantum is cleaner and newer. Second, I wanted to relocate my ONT into my structured wiring enclosure. I was out on a walk mid-July when I saw that Quantum was offering a deal for 940mbps service for $35/mo—I’ve never filled out a form so fast in my life. I also definitely waited very patiently for the installation day.
When the install day came, I let the technician know what I wanted to do. At first he was very apprehensive about moving the fiber line into the enclosure. I think he didn’t realize that I had already prepped for the install and all he needed to do was feed me the jumper cable and I would send it up through the crawl space. Once I explained that, he was on board and the ONT was installed and service transferred—it took only 20 minutes.

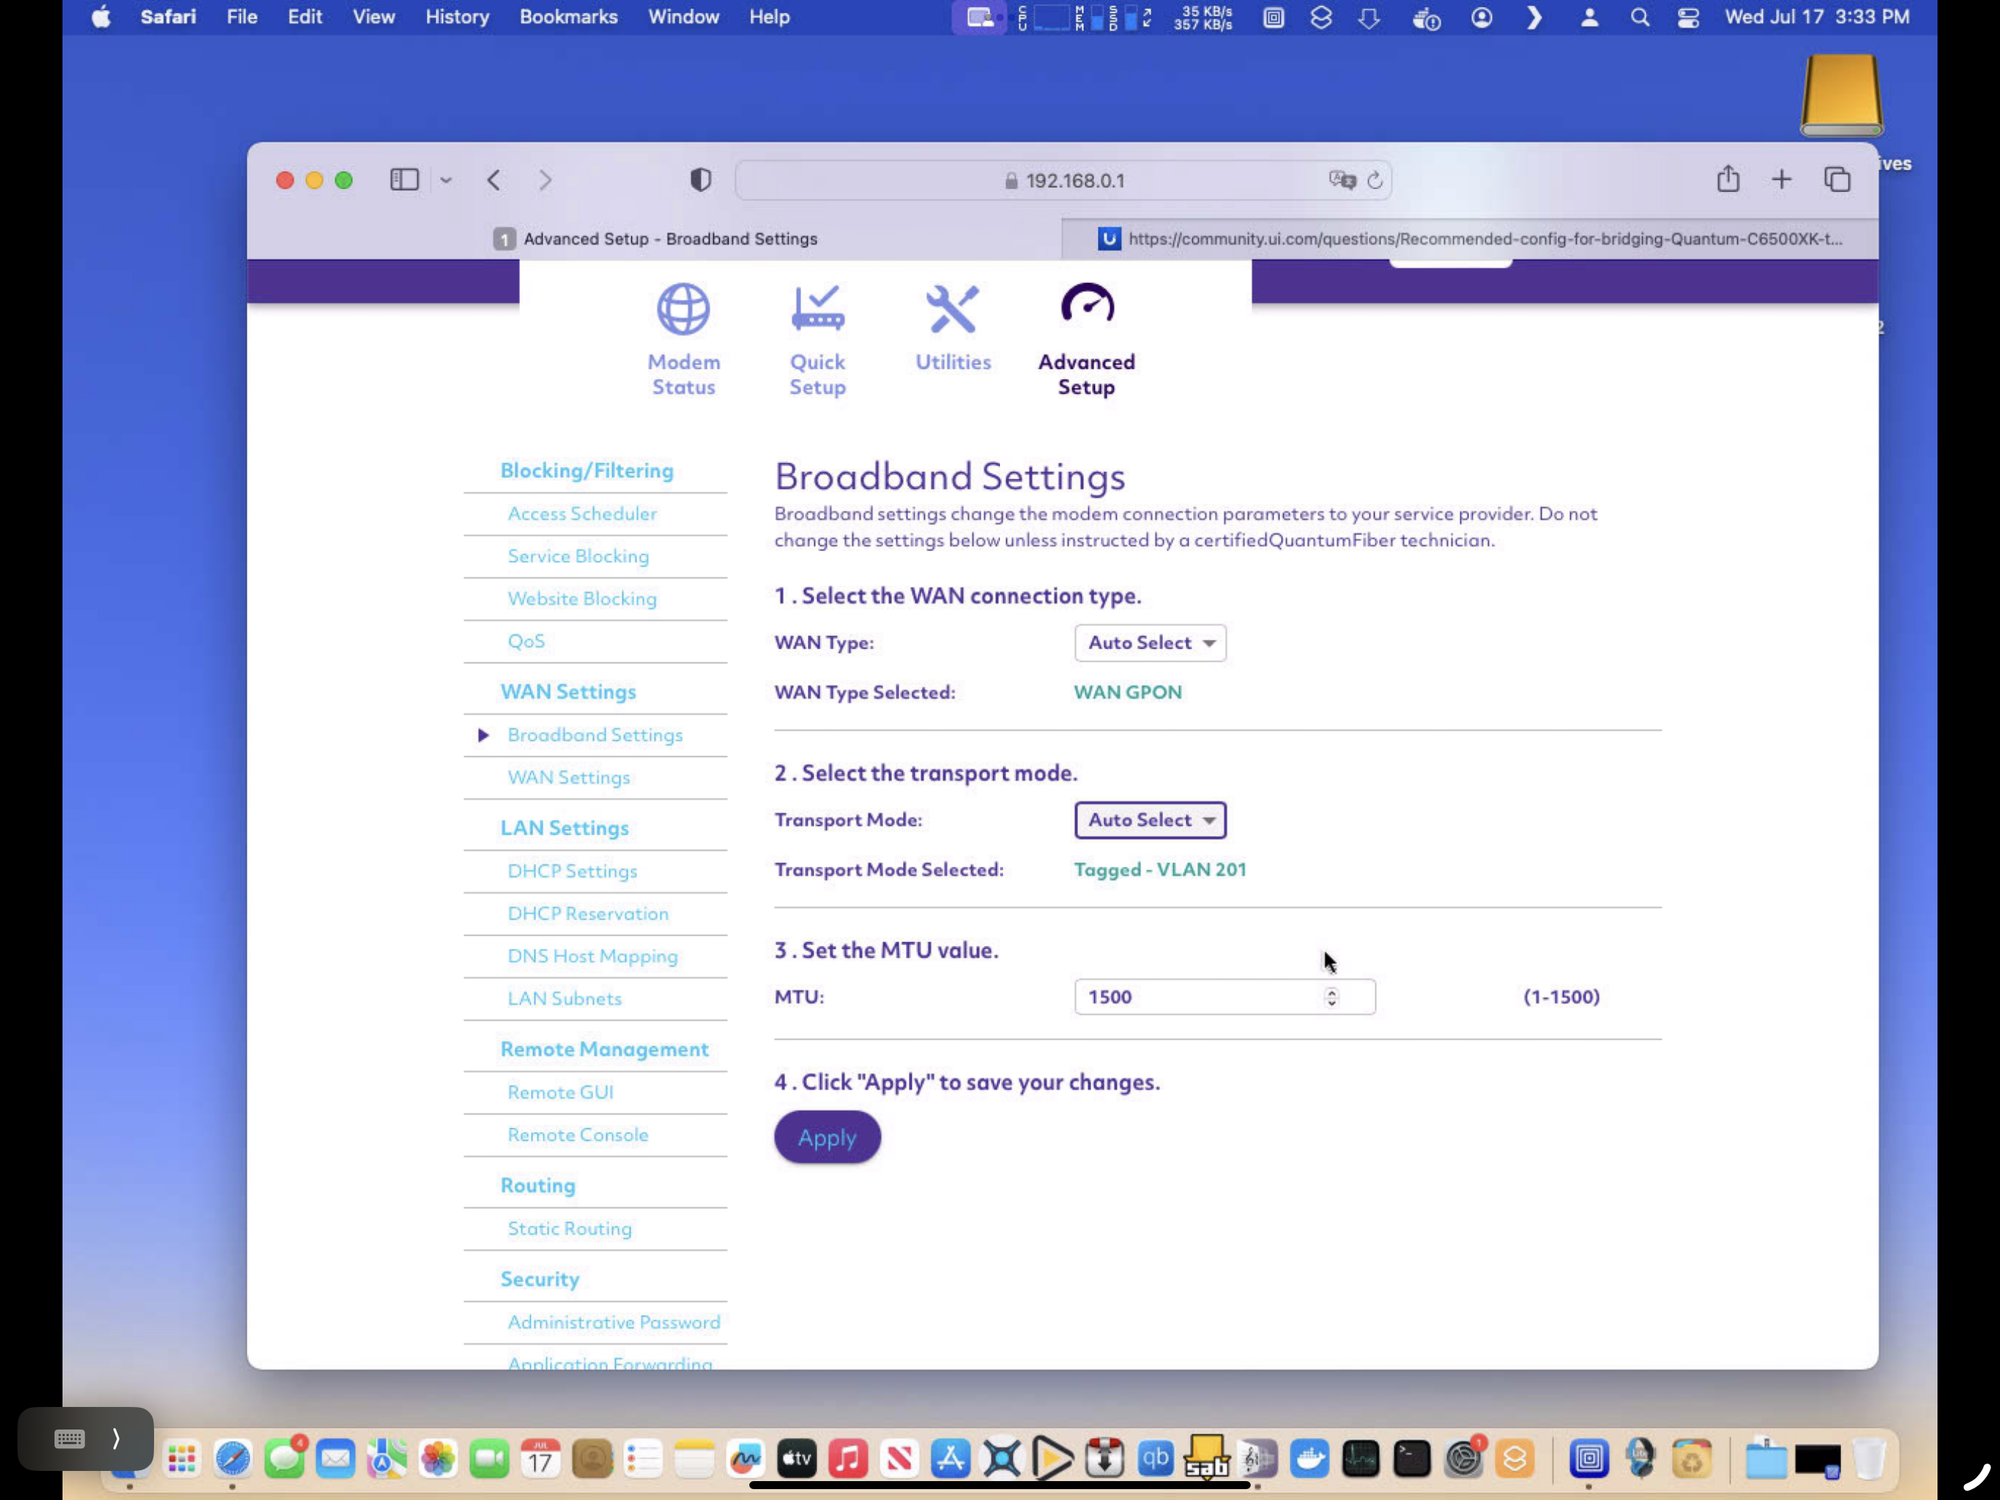
After the technician left, I quickly placed the ONT into bridge mode (the installed C5500XK is also a router) which was much more straightforward than the router CenturyLink provided. (That router refused to enter bridge mode, so I needed to configure my router to authenticate manually with my PPPoE credentials.) Configuring the ONT from quantum was very easy.

Within the WAN settings, under broadband settings in the screenshot above, all I needed to do was change the WAN type to bridge—I believe it said transparent bridging. The transport mode automatically set itself to tag vlan 201, and I didn’t need to enter any PPPoE credentials—I believe this is because Quantum doesn’t use PPPoE, though it’s possible the ONT just has it preprogrammed. From this point, my UniFi Dream Machine SE picked up a public IPv4 address and I was off to the proverbial races. It was all so easy.
Since this project, I have moved a few more devices ito the structured wiring enclosure. More to come about that.
